OpenVPN on OPNSense -> NordVPN - Selective traffic routing
This post details how to configure a NordVPN OpenVPN client on OPNSense and selectively route client traffic over the tunnel.

Here's how to configure OpenVPN client on OPNSense firewall and selectively route traffic from the network over the VPN tunnel.
Tested using OPNsense 25.7.7_4-amd64 (17/Nov/2025).
Steps:
- Download the OpenVPN config files from NordVPN website. I'm using the UDP version here.
Login to the NordVPN website and download the OpenVPN config files for your preferred location.

Open the config file which will be used to set up the client (OPNSense).
client
dev tun
proto udp
remote <ip> 1194
resolv-retry infinite
remote-random
nobind
tun-mtu 1500
tun-mtu-extra 32
mssfix 1450
persist-key
persist-tun
ping 15
ping-restart 0
ping-timer-rem
reneg-sec 0
comp-lzo no
verify-x509-name CN=<hostname>

remote-cert-tls server

auth-user-pass
verb 3
pull
fast-io
cipher AES-256-CBC
auth SHA512
<ca>
-----BEGIN CERTIFICATE-----
<trimmed>
-----END CERTIFICATE-----
</ca>
key-direction 1
<tls-auth>
#
# 2048 bit OpenVPN static key
#
-----BEGIN OpenVPN Static key V1-----
<trimmed>
-----END OpenVPN Static key V1-----
</tls-auth>
openVPN sample config
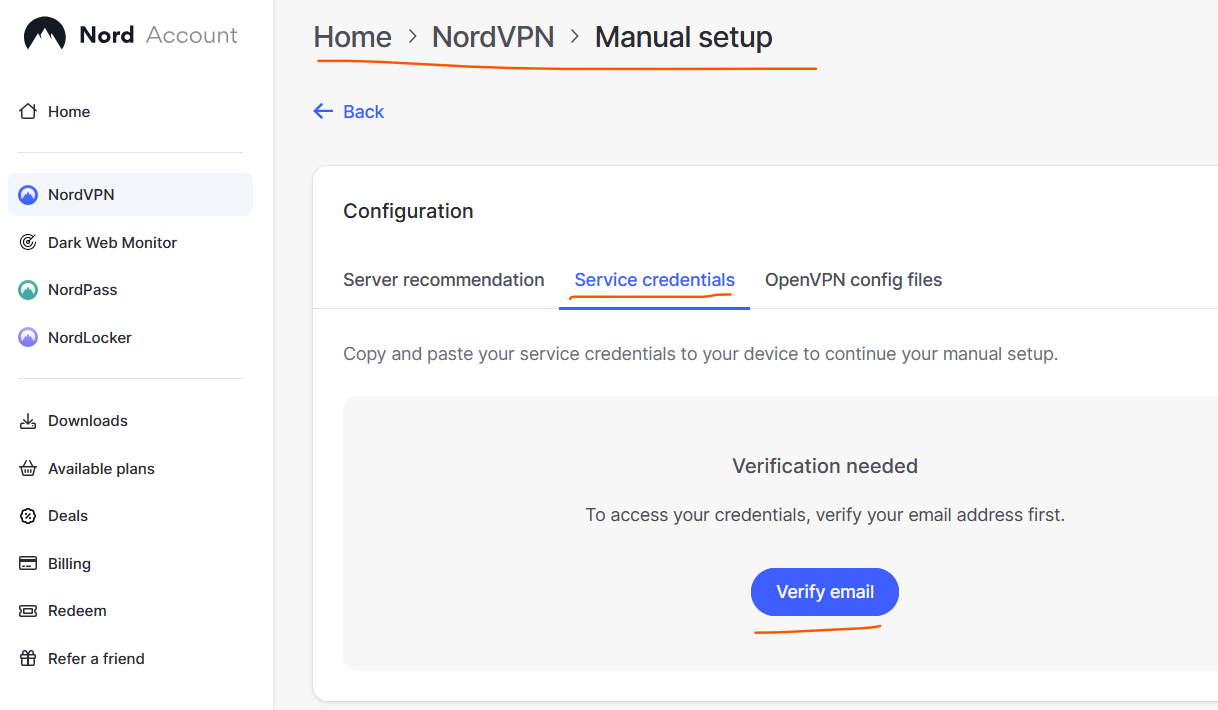
- Retrieve the NordVPN service credentials (username, password) from the website. NordVPN requires you to verify the email using a one-time code before the service credentials can be retrieved.
3. Login to OPNSense
- Import NordVPN CA certificate into the list of Trust Authorities (System > Trust > Authorities). Click on the + sign. Copy the CA certificate from the downloaded config file into the certificate data field.

Save.
5. Add the OpenVPN static key to OPNSense
Go to VPN -> OpenVPN -> Instances -> Static Keys. Click on + sign, give it a name, mode is 'auth' and paste the Static key content from config file (see screenshot below).

Save and Apply.
- Add an OpenVPN instance (VPN -> OpenVPN -> Instances -> Instances)
Click on + sign. Toggle advanced mode ON.
Fill in the details from the config file. Refer screenshot below.

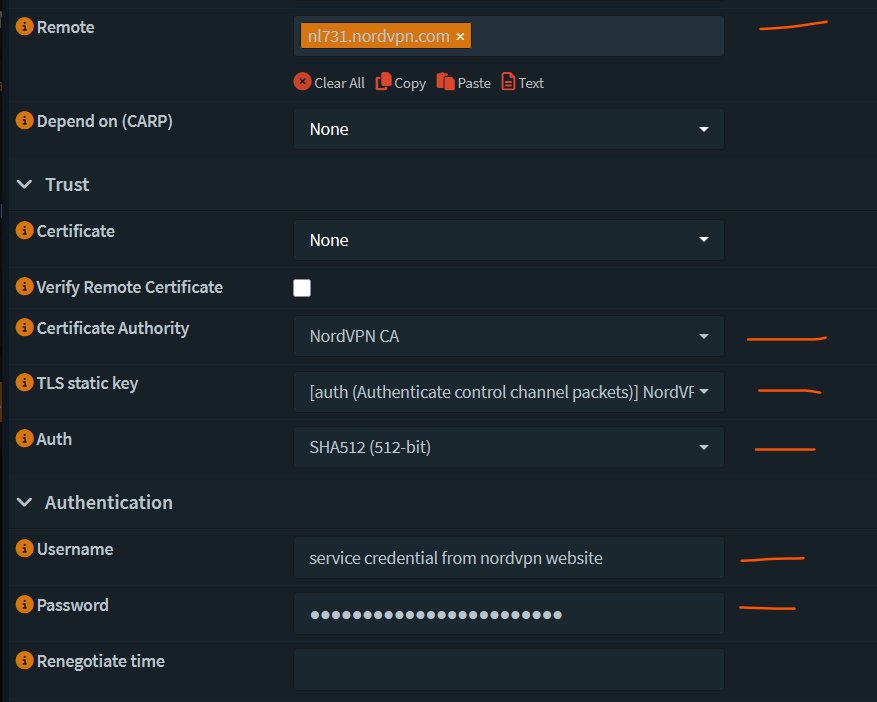
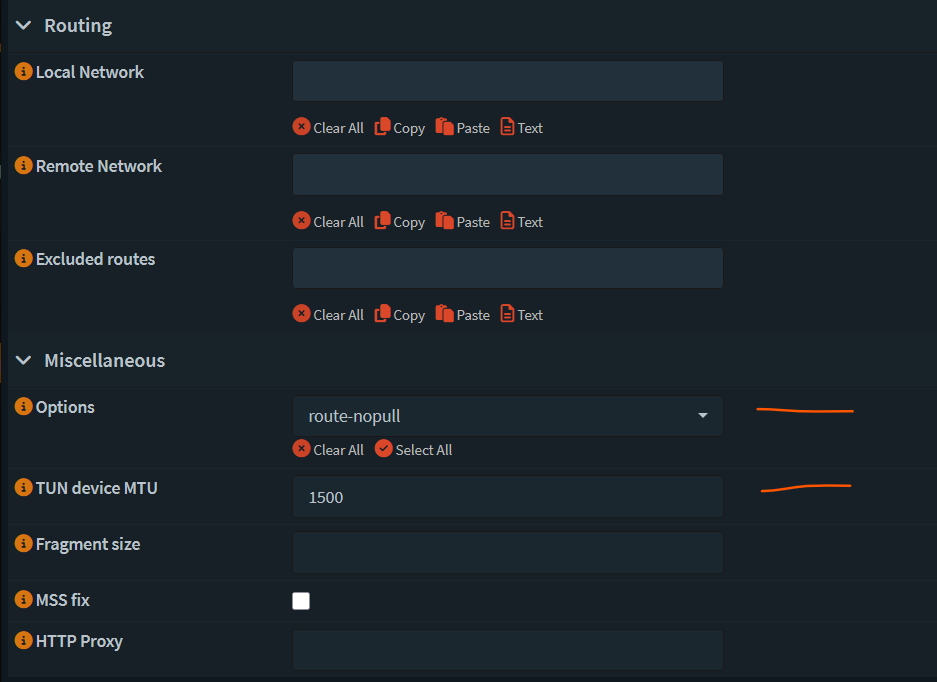
Save and Apply.
The configuration can be verified by going to the Connection Status area and checking if the connection was established for the new OpenVPN instance.
- Assign an Interface (Interfaces > Assignments)
Select the instance just created, give it a description, hit Add and then Save on the page.

- Click on the Interface that was just added and enable it. Leave all other options as their default.

Save and Apply changes.
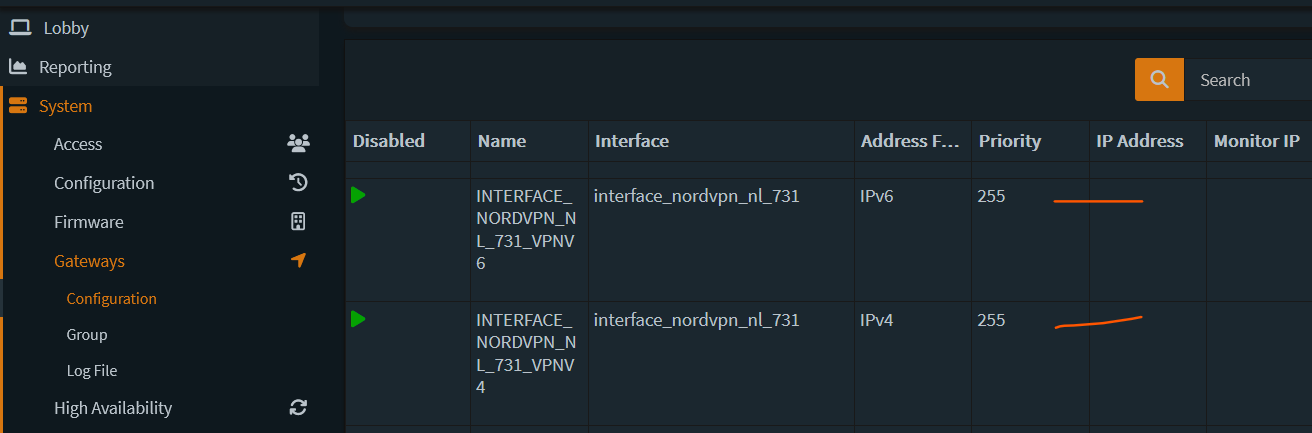
- The gateways should be added at this point which can be verified by going to System -> Gateways -> Configuration
- Add Outbound NAT rules
Go to Firewall -> NAT -> Outbound
Ensure that Mode is set to Hybrid.
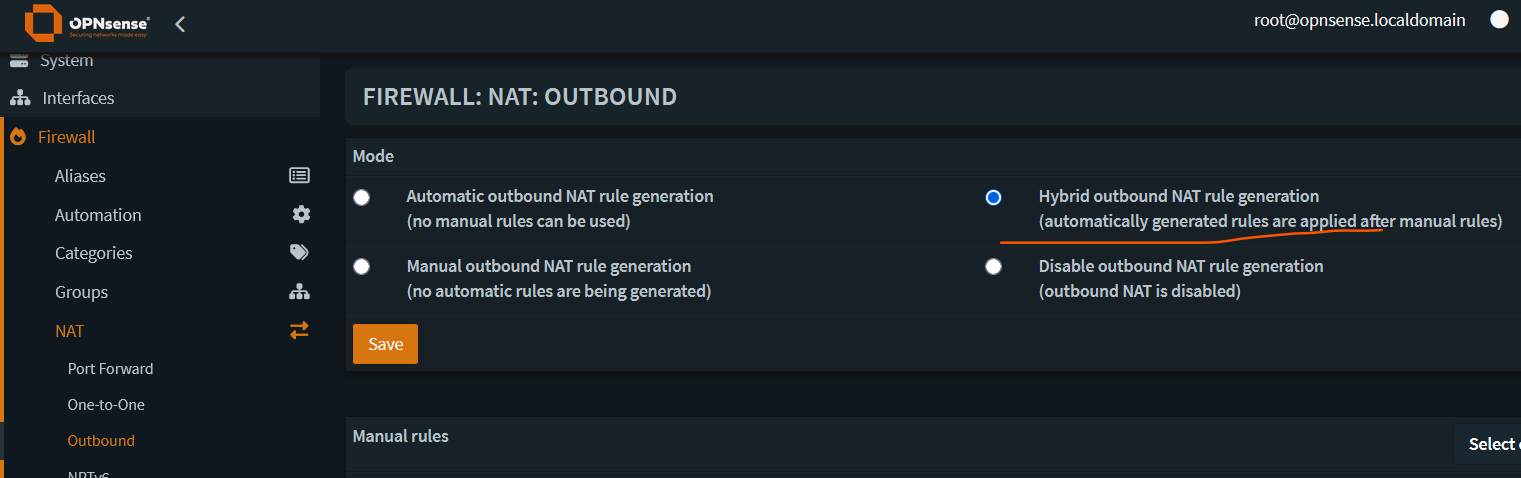
Under Manual rules, click on the + sign.
Make the edits as per the screenshots below.

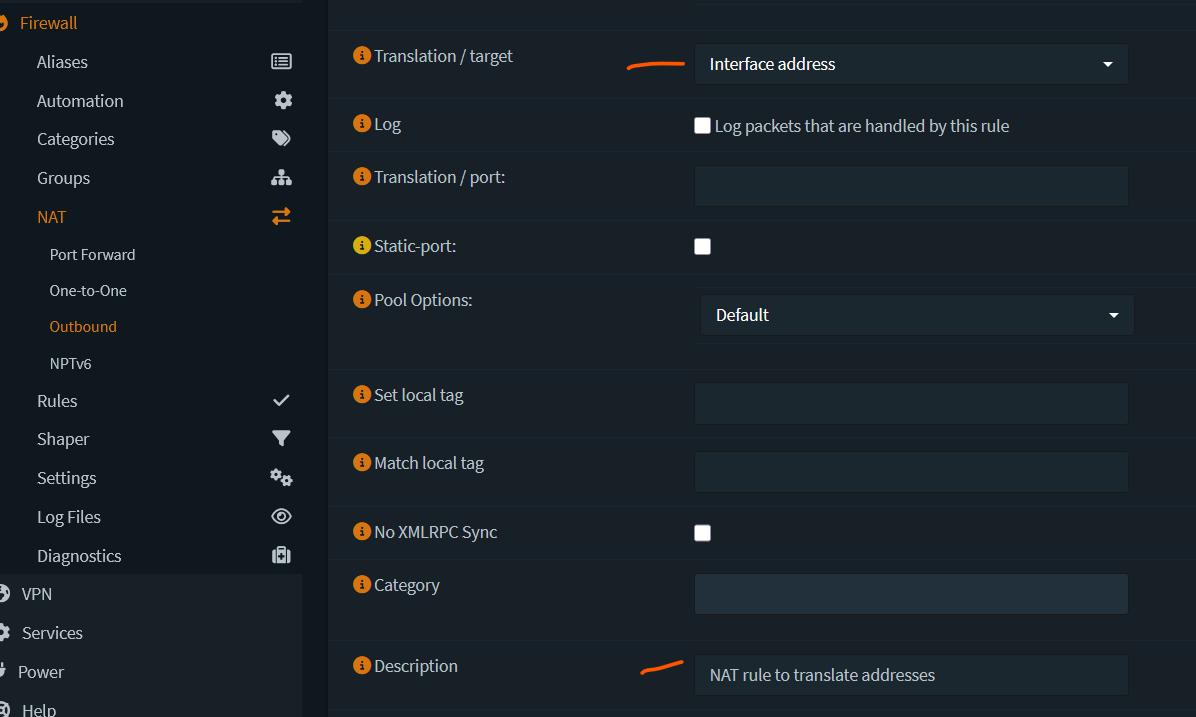
Save and Apply changes.
- Add an alias to represent the clients that need to be routed over the VPN tunnel. (Firewall -> Aliases -> click on + sign)
Get the MAC address of the network interface. (on Windows use ipconfig/all or ifconfig on Linux to find the MAC address)
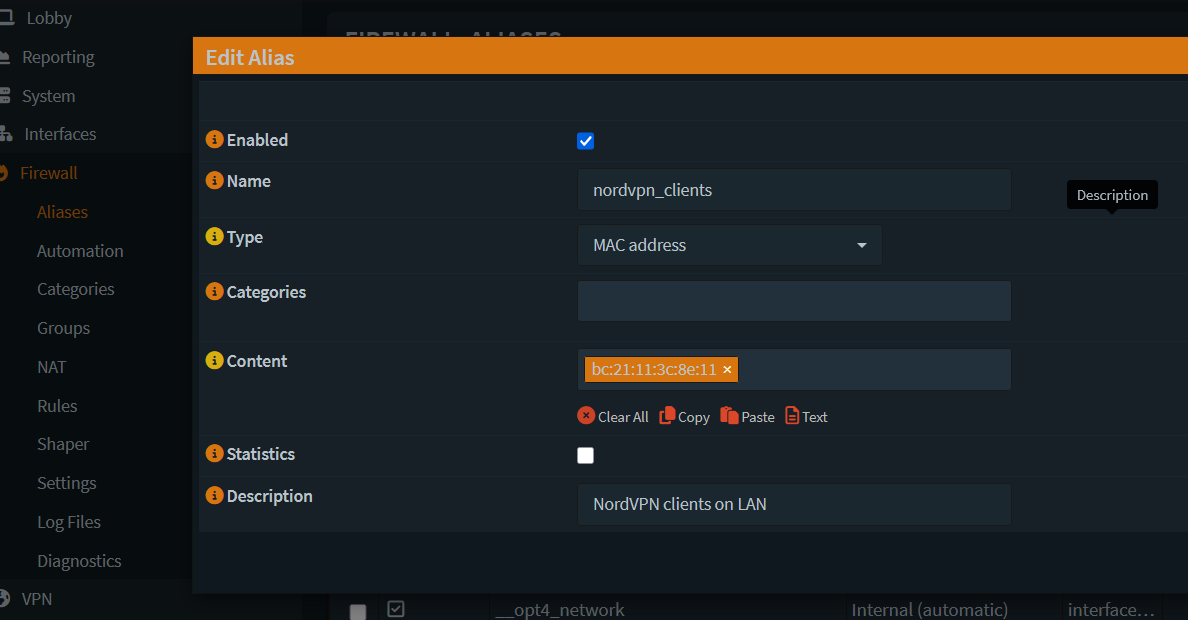
Save and Apply.
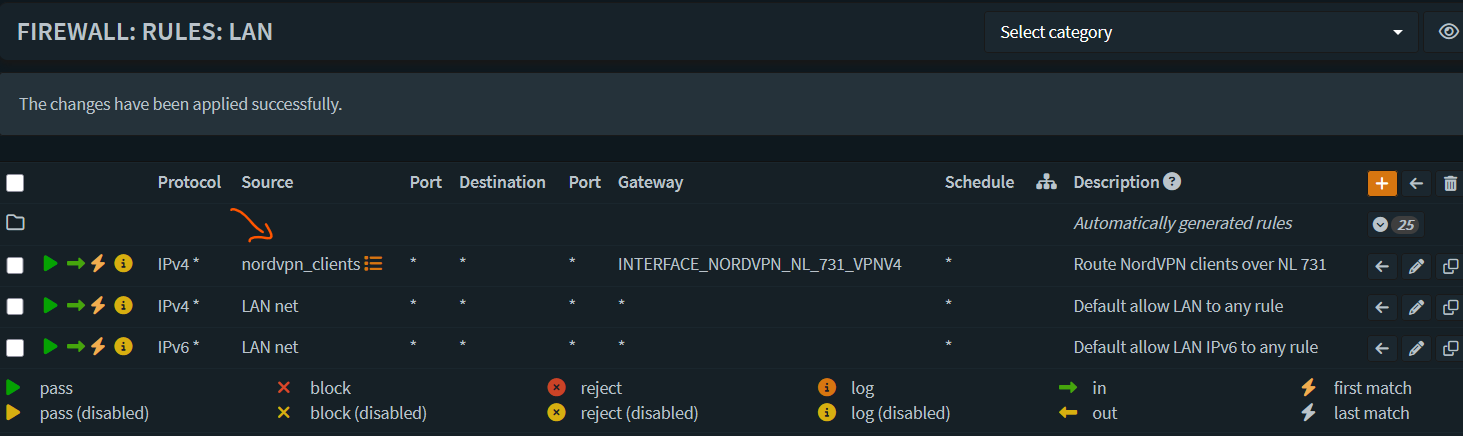
- Now add a firewall rule to route traffic from this client over the VPN gateway that was created.
Go to Firewall -> Rules -> LAN -> Click on + sign
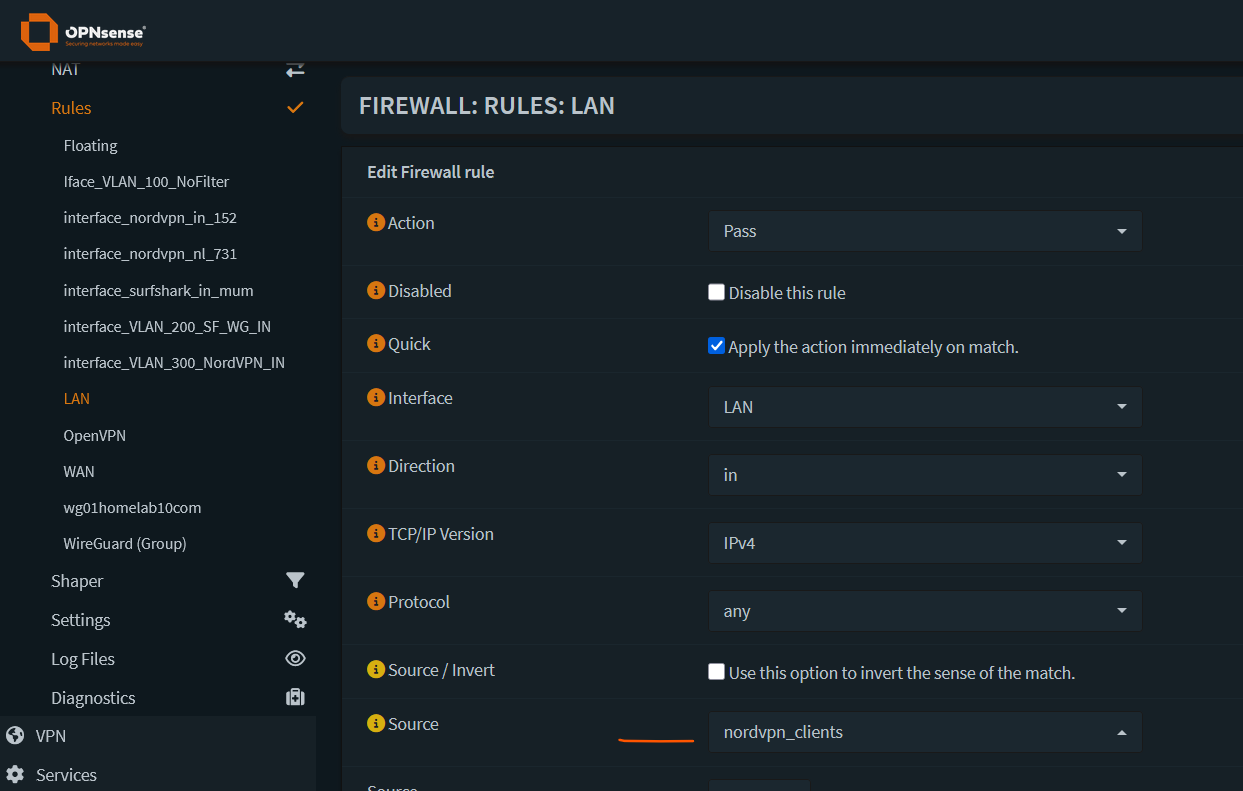

Click Show/Hide button next to Advanced Features.
Set local tag = NO_WAN_EGRESS. This will be used to configure the killswitch later.
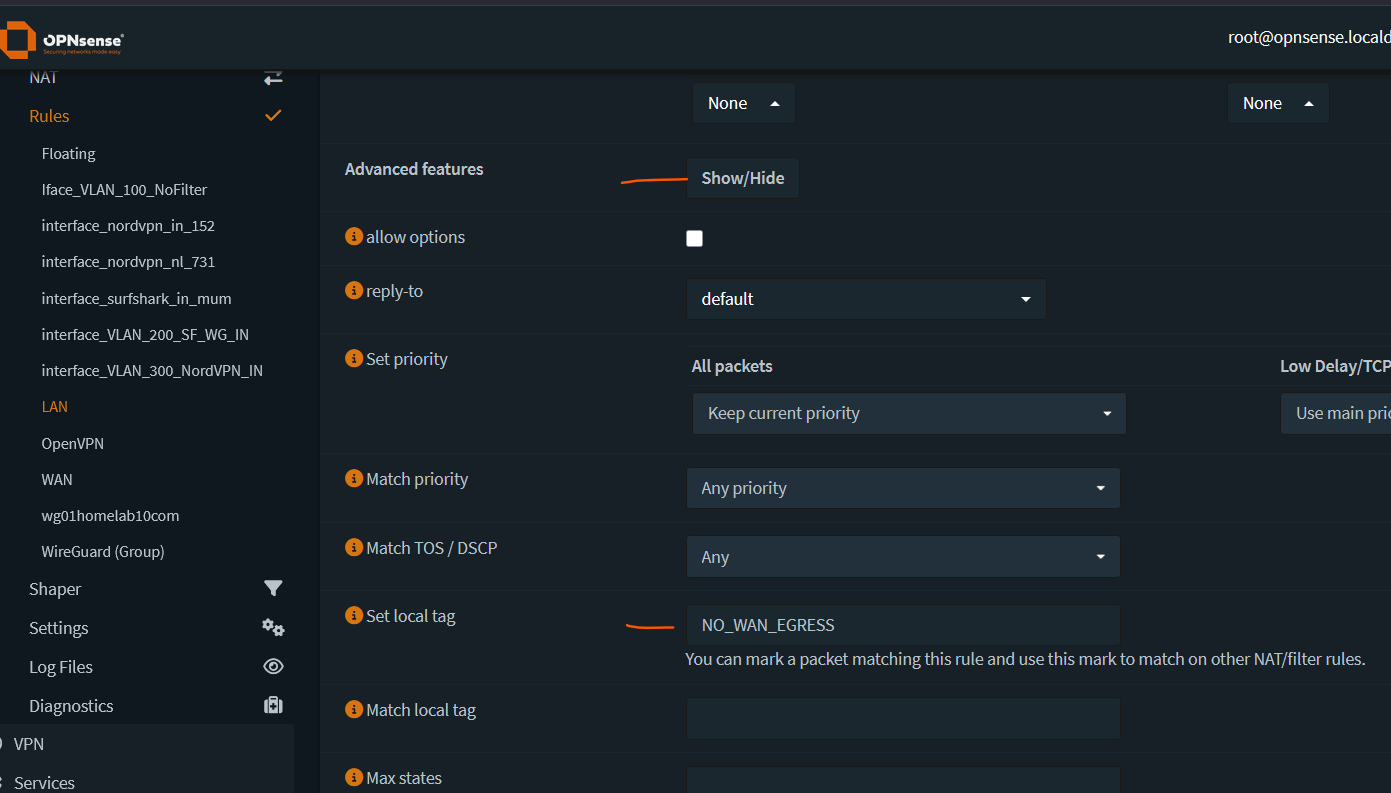
Save and Apply changes.
Make sure that the new rule is moved before any existing default rules.
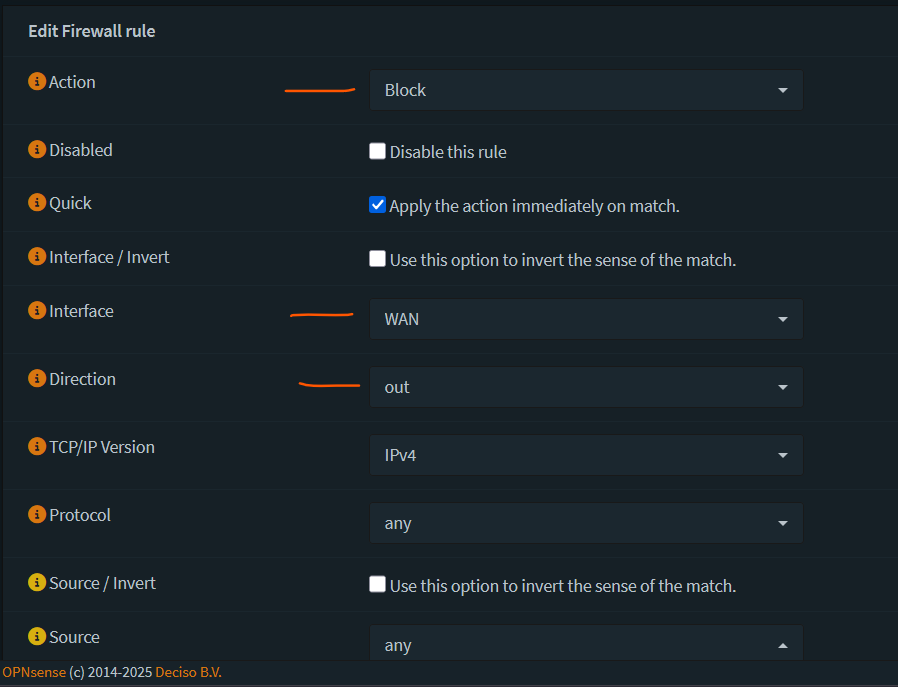
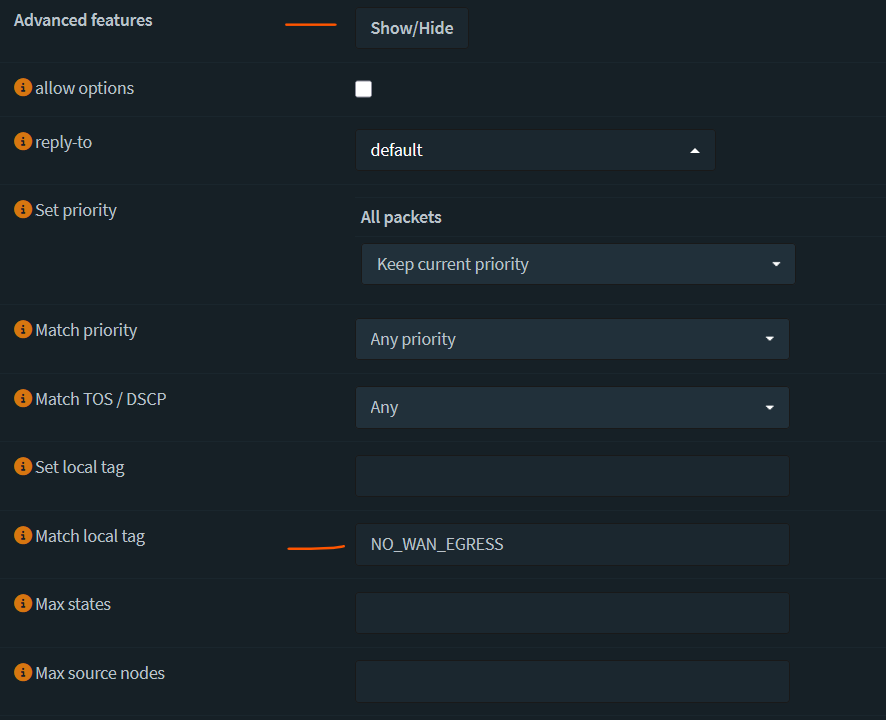
- Configure a killswitch to drop traffic if the VPN connection drops. To do that, add a firewall rule on the WAN interface to drop all packets with a local_tag of NO_WAN_EGRESS.
Go to Firewall -> Rules -> WAN -> click + sign
Save and apply changes.
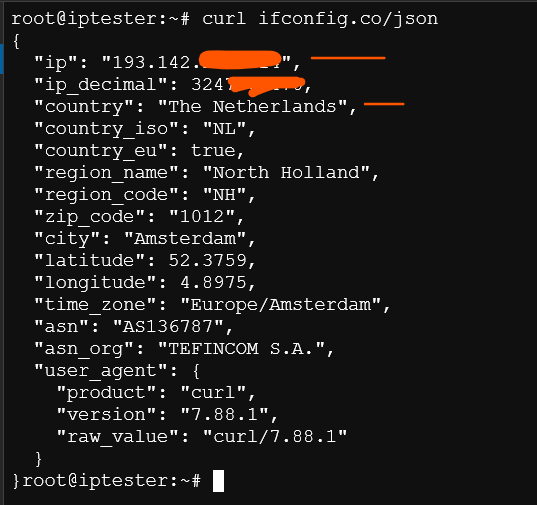
- Verify that the client traffic is routed over the VPN tunnel by going to a browser and visiting a site like whatismyipaddress.com or from the terminal.
Thanks!